|
MFC
Topics: CPrintDialog, PRINTDLG, CPrintInfo, GetDeviceName
|
| |
|
Printing
is usually considered as the ability
to draw, on a piece of paper, the
contents of a document. The document
can be a picture (graphic), simple
text, or rich text, etc. To make
this possible, a printing device is
primarily connected, wired or
wirelessly, to a computer. This
means that a type of connection must
exist between both machines. The
machine that holds the document is a
computer equipped with a processor
and it is loaded with the
application that would open the
document. The computer is
responsible for various early
assignments such as drawing the
document on the computer screen for
the user to preview. This allows the
user to have an idea of what the
printed result would look like,
before sending it to the peripheral
responsible for drawing it on paper.
|
|
To assist the users with printing, the Microsoft
Windows operating system provides a convenient
dialog box named Print. Based on this, to print
from an application, a user usually clicks File
-> Print… from the main menu. In most
applications, this action would display the
Microsoft Windows Print dialog box.
The
Print dialog is implemented in the MFC library
through the CPrintDialog
class. To programmatically display the Print
dialog box, you can declare a variable of type CPrintDialog.
The syntax of its constructor is:
CPrintDialog(BOOL bPrintSetupOnly,
	     DWORD dwFlags = PD_ALLPAGES |
			     PD_USEDEVMODECOPIES |
			     PD_NOPAGENUMS |
			     PD_HIDEPRINTTOFILE |
			     PD_NOSELECTION,
	     CWnd* pParentWnd = NULL );
Only
one argument of this constructor is required and
it is of type BOOL. To get the Print dialog box,
pass this argument with a FALSE value.
|
Displaying
the Print Dialog Box
|
| |
When
the user clicks File -> Print… or decides to
initiate printing, you should display the Print
dialog box. To do this, after declaring a CPrintDialog
variable with a FALSE value, you can call its DoModal()
method whose syntax is:
virtual INT_PTR DoModal();
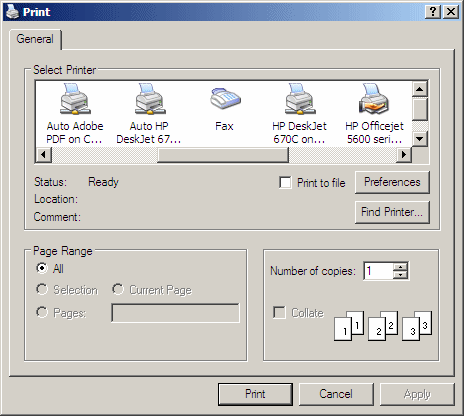
This
would display the Print dialog box as it is
defined in the Microsoft Windows operating
systems:
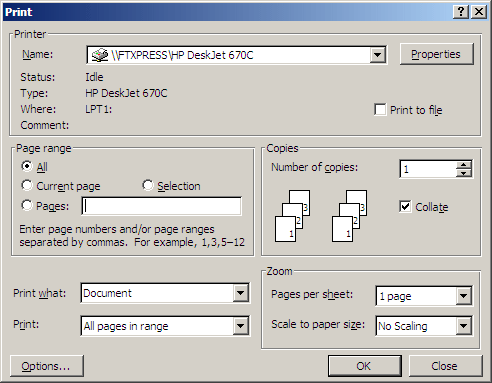
The
way this dialog box appears may depend on the
operating system or the application. For example,
here is the Print dialog box from Microsoft
Office Word 2003:
Although
many commercial applications provide a customized
version of this dialog box, the functionality is
primarily the same.
For
the user’s standpoint, the Print dialog box
provides the various options used to customize the
result that would display on a sheet of paper.
For
a programmer with the MFC library, the information
displayed on a Print dialog box is stored in an
object based on a structure named CPrintInfo.
As mentioned already, to start printing, the user
would call the Print dialog box. When this is
done, the application internally creates a CPrintInfo
object. This object is made ready and available to
you just before the user can see the Print dialog
box. This gives you the time to change or
customize what the user would see on the dialog
box.
At
the operating system level, the information of a
Print dialog box is stored in a structure named PRINTDLG.
To provide access to this structure in MFC, a CPrintDialog
object is equipped with a member variable named m_pd.
This member is simply a reference to a PRINTDLG
object.
|
The
Default Values of a Print Dialog Box
|
| |
To
make printing a little faster, when the Print
dialog box comes up, it displays default
characteristics that the user can accept and
simply click OK to print, as we did in the
previous sections. Those default characteristics
are stored in (as members of) a PRINTDLG
object. To get the default characteristics of the
Print dialog that is displaying to the user, you
can call the CPrintDialog::GetDefaults().
Its syntax is:
BOOL GetDefaults();
After
calling this method, to get a particular value of
the dialog box, you can access its corresponding
member of the m_pd
variable. We will review the members of the PRINTDLG
structure in the new sections.
|
The
Functionality of the Print Dialog Box
|
| |
The
Print dialog box displays the word Print as its
caption. The right side is equipped with the help
and the close buttons. The help button allows you
to get information about a section or control on
the dialog box. To use it, you can click it and
click an object on the window.
Probably
the most important section of the dialog box is a
group labeled Select Printer or simply, Printer.
This section is equipped with either a list view
or a combo box named Name. This control displays
the list of printers
available to the user: it is the list of printers
installed or mapped to the current computer. In
order to print, this box should show at least one
item. If there is no printer installed or mapped,
when trying to print, the user may receive a
warning or an error.
Before
printing, the user must select a printer in the
Name control. Because a print must have been
installed for the user to select one, you cannot
just add a name to this control. On the other
hand, after a user has selected one, to get the
name of the printer that the user selected, you
can call the CPrintDialog::GetDeviceName()
method. Its syntax is:
CString GetDeviceName() const;
As
you can see, this method returns a string that
represents the name of the selected printer.
Some
applications, such as Adobe Acrobat, allow a user
to start the process of printing but not actually
print. The application would instead save the
document to a file. Whether the user has such an
application or not, the Print dialog box provides
an alternative. It is equipped with a Print To
File check box. The presence, behavior, or absence
of the Print To File check box is controlled by
three flags. To display the check box, you should
add the PD_PRINTTOFILE
value. Here is an example:
void CExerciseDlg::OnBnClickedPrintBtn()
{
	// TODO: Add your control notification handler code here
	CPrintDialog dlg(FALSE, PD_PRINTTOFILE);
	dlg.DoModal();
}
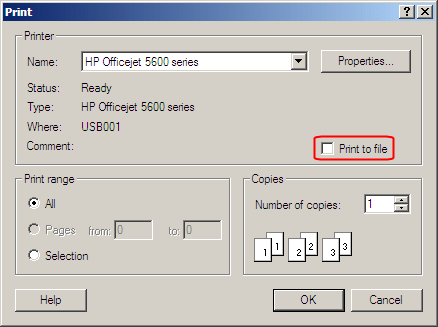
If
the user uses this check box and prints, he or she
would be prompted to specify a name of a file in
the Print To File dialog box:

After
the user has entered a name and clicks OK, a file
would be created and saved in the My Documents
folder: this is the standard in Microsoft Windows.
Some applications, such as Internet Explorer,
allow you to specify the options:
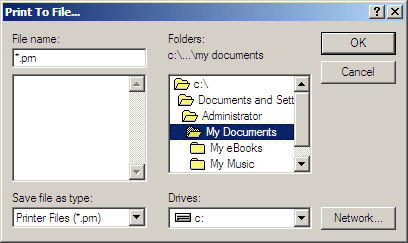
In
this case, you can specify a directory, using the
Folders control, where to save the file and the
file would receive a .prn extension. If you
don’t want the user to have the option of
creating such a file, add the PD_DISABLEPRINTTOFILE
flag to the dwFlags argument of the CPrintDialog
constructor:
void CExerciseDlg::OnBnClickedPrintBtn()
{
	// TODO: Add your control notification handler code here
	CPrintDialog dlg(FALSE, PD_ALLPAGES | PD_SELECTION |
				PD_DISABLEPRINTTOFILE);

	dlg.DoModal();
}
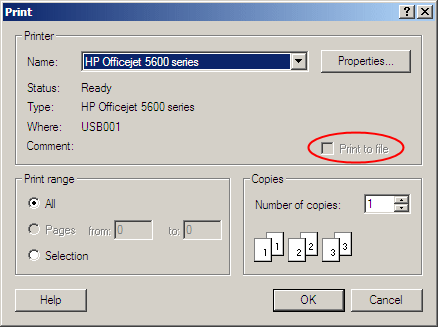
This
would only disable the control but to show the
user that the operation cannot be carried at this
time. As an alternative, if you don’t even want
the user to be aware of it, you can hide it. To do
this, add the PD_HIDEPRINTTOFILE flag to
the dwFlags argument:
void CExerciseDlg::OnBnClickedPrintBtn()
{
	// TODO: Add your control notification handler code here
	CPrintDialog dlg(FALSE, PD_HIDEPRINTTOFILE);

	dlg.DoModal();
}
One
of the options the user has (or may have) when
printing is to decide whether to print the whole
or part of the document. This is controlled in the
Page Range section that displays three radio
buttons. By default, the user is supposed to print
the whole document. For this reason, the All radio
button can be selected. This is the
default-selected button of the Print Range
section. In fact, if you create a CPrintDialog
object with only the FALSE value as argument, only
the All radio button would be allowed and it would
be selected:
void CExerciseDlg::OnBnClickedPrintBtn()
{
	// TODO: Add your control notification handler code here
	CPrintDialog dlg(FALSE);

	dlg.DoModal();
}

The
option to have the All radio button is done with
the PD_ALLPAGES flag of the dwFlags
argument of the CPrintDialog() constructor.
Suppose the document to print is made of text.
Instead of printing everything, the user may want
to first select a section of the document. Here is
an example:
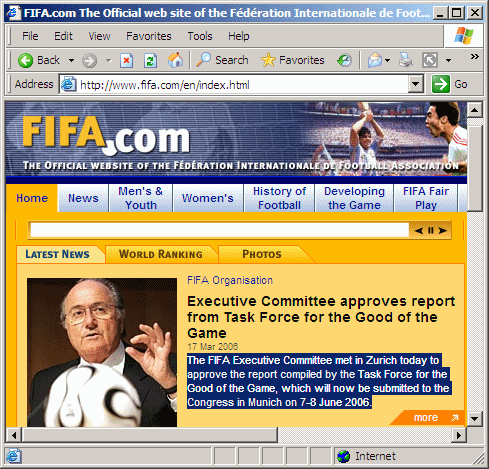
In
this case, you can give the user the option to
print the whole document or only the selected
section. To print only the selection, the user can
click the Selection radio button. To make this
possible, you can simply add the PD_ALLPAGES
flag when creating a CPrintDialog object.
Here is an example:
void CExerciseDlg::OnBnClickedPrintBtn()
{
	// TODO: Add your control notification handler code here
	CPrintDialog dlg(FALSE, PD_ALLPAGES);

	dlg.DoModal();
}
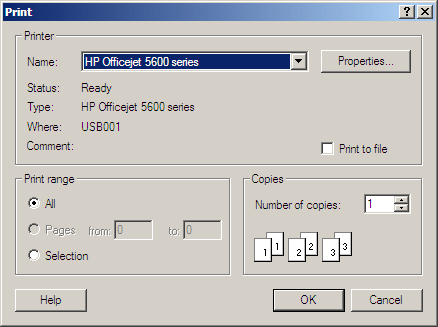
In
this case, to print a selected section of the
document, the user can click the Selection radio
button. If you omit the PD_ALLPAGES flag,
the Selection radio button is automatically
disabled. As an alternative, if you want the
Selection control to be selected by default when
the Print dialog box comes up, add the PD_SELECTION
flag to the dwFlags argument of the CPrintDialog
object:
void CExerciseDlg::OnBnClickedPrintBtn()
{
	// TODO: Add your control notification handler code here
	CPrintDialog dlg(FALSE, PD_ALLPAGES | PD_SELECTION);
	dlg.DoModal();
}
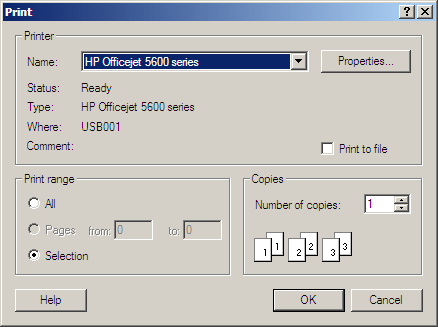
Imagine
the document is made of various pages, such 12,
after or without primarily selecting a section of
the document, the user may want to print only one,
two, or a range of pages, such as pages 4 to 6. To
make this possible, the Print dialog box is
equipped with the Pages radio button. By default,
this option is not available. This is because the PD_NOPAGENUMS
flag is set. You can reinforce this by adding the PD_NOPAGENUMS
flag to the dwFlags argument of the CPrintDialog
constructor. Here is an example:
void CExerciseDlg::OnBnClickedPrintBtn()
{
	// TODO: Add your control notification handler code here
	CPrintDialog dlg(FALSE, PD_ALLPAGES | PD_SELECTION |
				PD_NOPAGENUMS);
	dlg.DoModal();
}
If
you want the user to be able to print a range of
pages, the first action you must take is to enable
this button. To do this, first add a PD_PAGENUMS
flag to the dwFlags of the CPrintDialog
constructor. There are other details to actually
allow the user to print a range of pages.
By
default, when the user decides to print, the
dialog assumes that only one sample would be
needed. In some cases, the user may want to print
more than one sheet of paper. To specify the
number of samples, the user can change the value
of the Number Of Copies spin button.
If
the user changes the value of the Number Of Copies
control higher than one, the Collate check box
becomes enabled. It allows the user to specify the
sequence of printing the group of pages for each
job.
After
accepting the defaults or specifying the options
on the Print dialog box, the user can click OK to
send the job to the device.
|


